Independent Ticketing System Frontend
In the previous part of this tutorial, you built the package contract for the Independent ticketing system. Now, you can create the UI. To create the frontend dApp, we use IOTA dApp kit. Apart from the dApp kit, we will also use an external package for client-side routing, which is react-router-dom.
Set Up the Frontend dApp
First, create an initial react app using the following command:
pnpm create @iota/create-dapp
Set Up Network Configuration
Add the following variables in the networkConfig.ts file:
loading...
You should retrieve the shared objects from the transaction digest of the published package.
To mint a ticket from the UI, ensure that the IOTA wallet account is added to the IOTA CLI. This should be mentioned in the Simple Token Transfer tutorial.
Folder Structure
App.tsx
This component serves as the entry point, containing the navbar and the outlet component for client-side routing.
loading...
AvailableTickets.tsx
The AvailableTickets.tsx component displays all NFT tickets available for purchase, including newly minted tickets and tickets listed for resale.
loading...
BurnTickets.tsx
The BurnTickets.tsx component handles the burning of ticket nfts. It functions as a child component of OwnedTickets.tsx and is rendered only when a ticket listed by the OwnedTickets.tsx component is being burned.
loading...
Form.tsx
The Form.tsx component is an input form used to collect inputs for all operations. It is a versatile component utilized everywhere except in the OwnedTickets.tsx operation.
loading...
Home.tsx
The Home.tsx component displays buttons for all operations and a list of owned objects associated with the currently connected account.
loading...
Mint.tsx
The Mint.tsx component allows the creator to mint tickets and is exclusively accessible to them.
loading...
NftForm.tsx
The NftForm.tsx is an input form used specifically in the OwnedTickets.tsx operation.
loading...
Ownedtickets.tsx
The OwnedTickets.tsx component lists all the NFT tickets owned by the connected account. It only displays objects of the TicketNFT type, excluding other types.
loading...
ResellTickets.tsx
The ResellTickets.tsx component is used for reselling NFTs. It is only utilized when someone resells an NFT listed in the OwnedTickets.tsx component.
loading...
TransferTickets.tsx
The TransferTickets.tsx component is used to transfer the ownership of an NFT to another recipient address. Similar to the BurnTickets.tsx and ResellTickets.tsx components, this component is rendered when someone transfers an NFT from the list of NFTs in the OwnedTickets.tsx component.
loading...
- Deployed Frontend Application: Independent Ticketing System
Usage Example
Dashboard
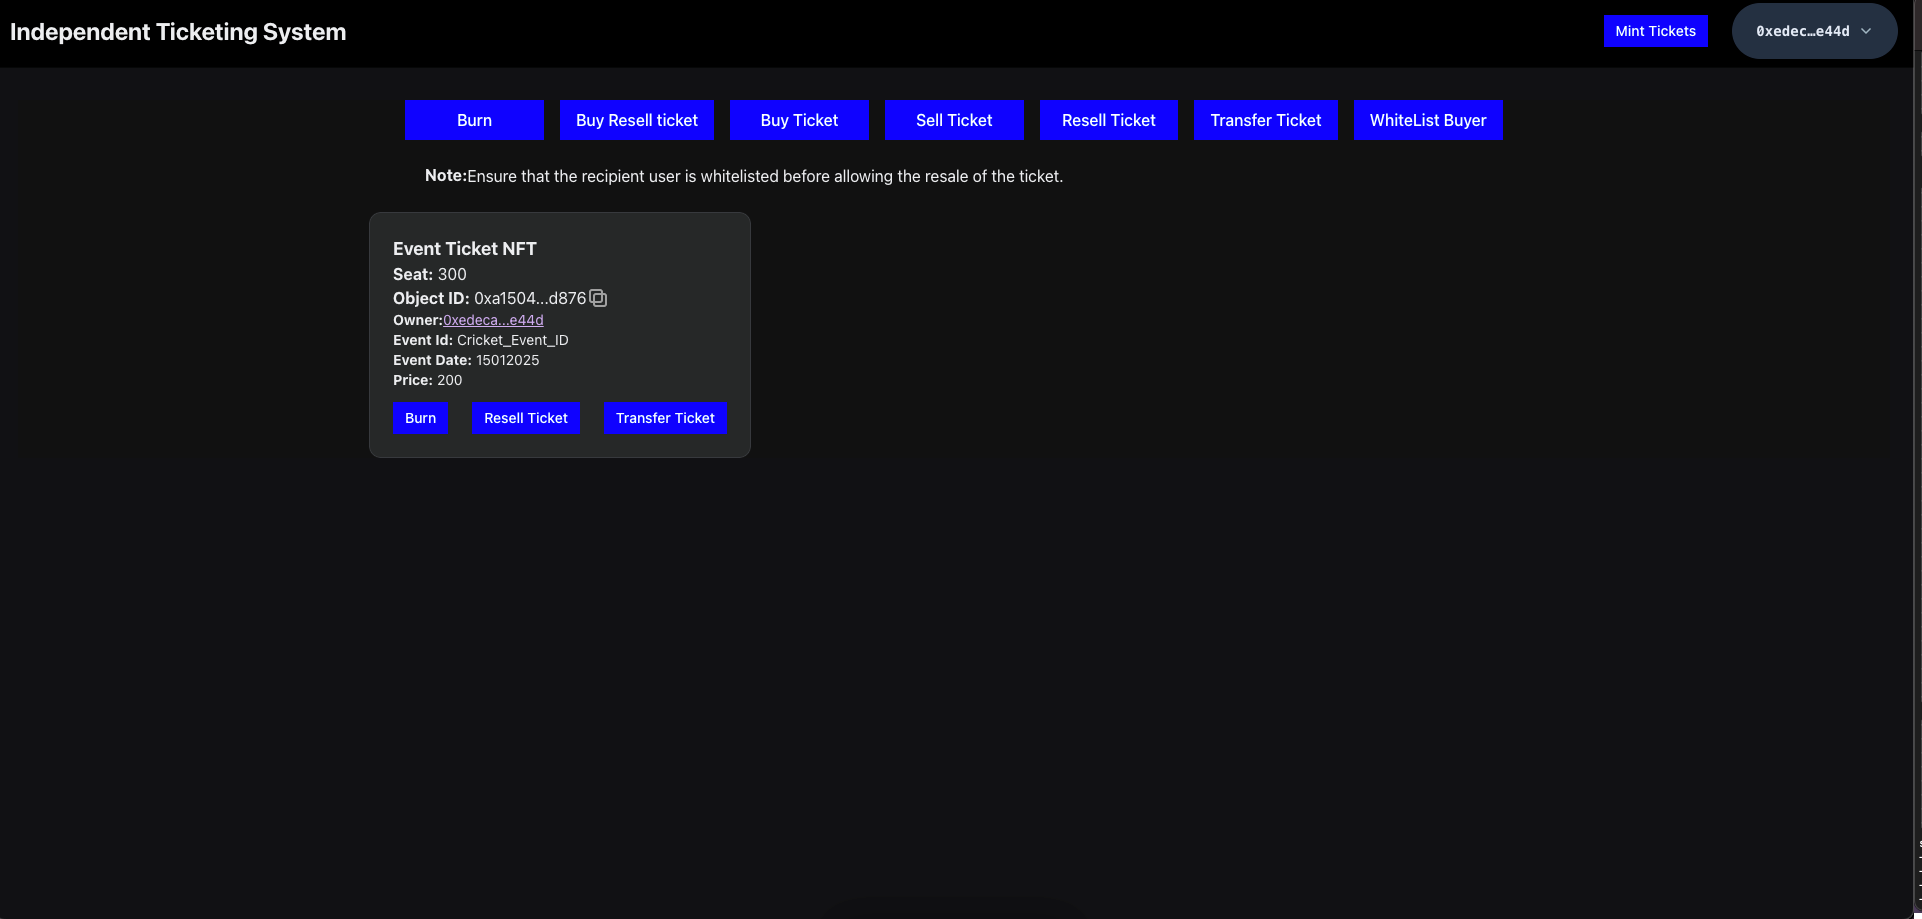
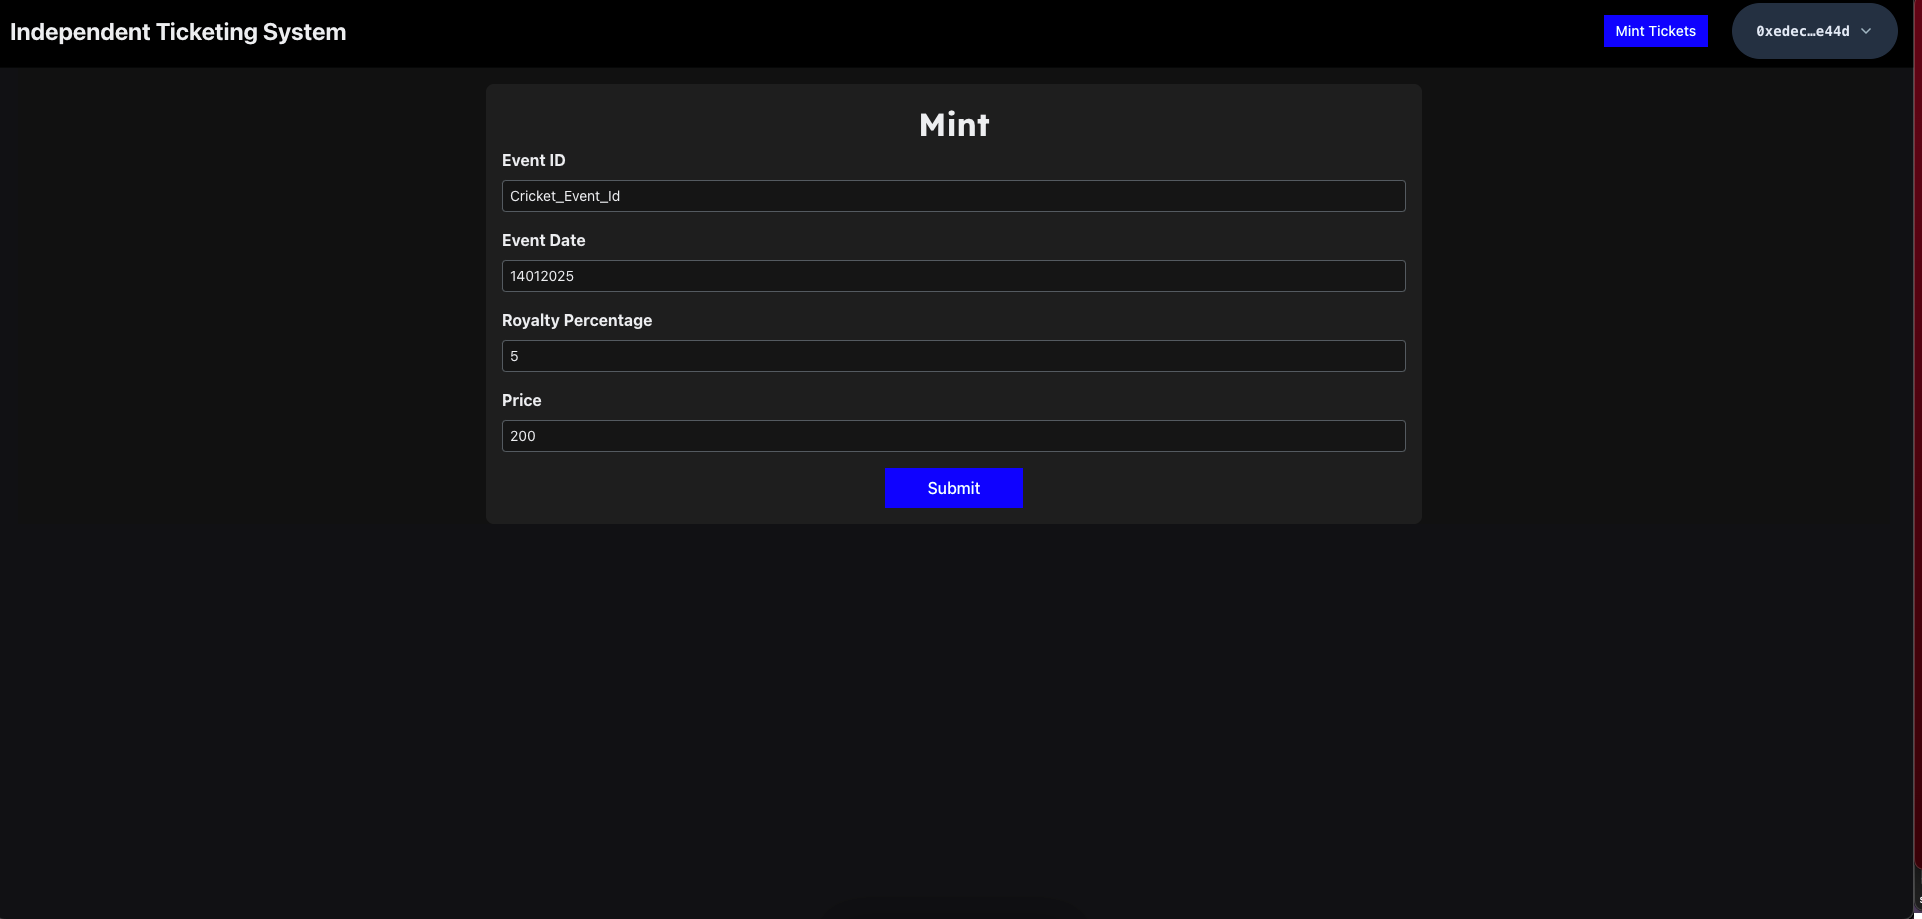
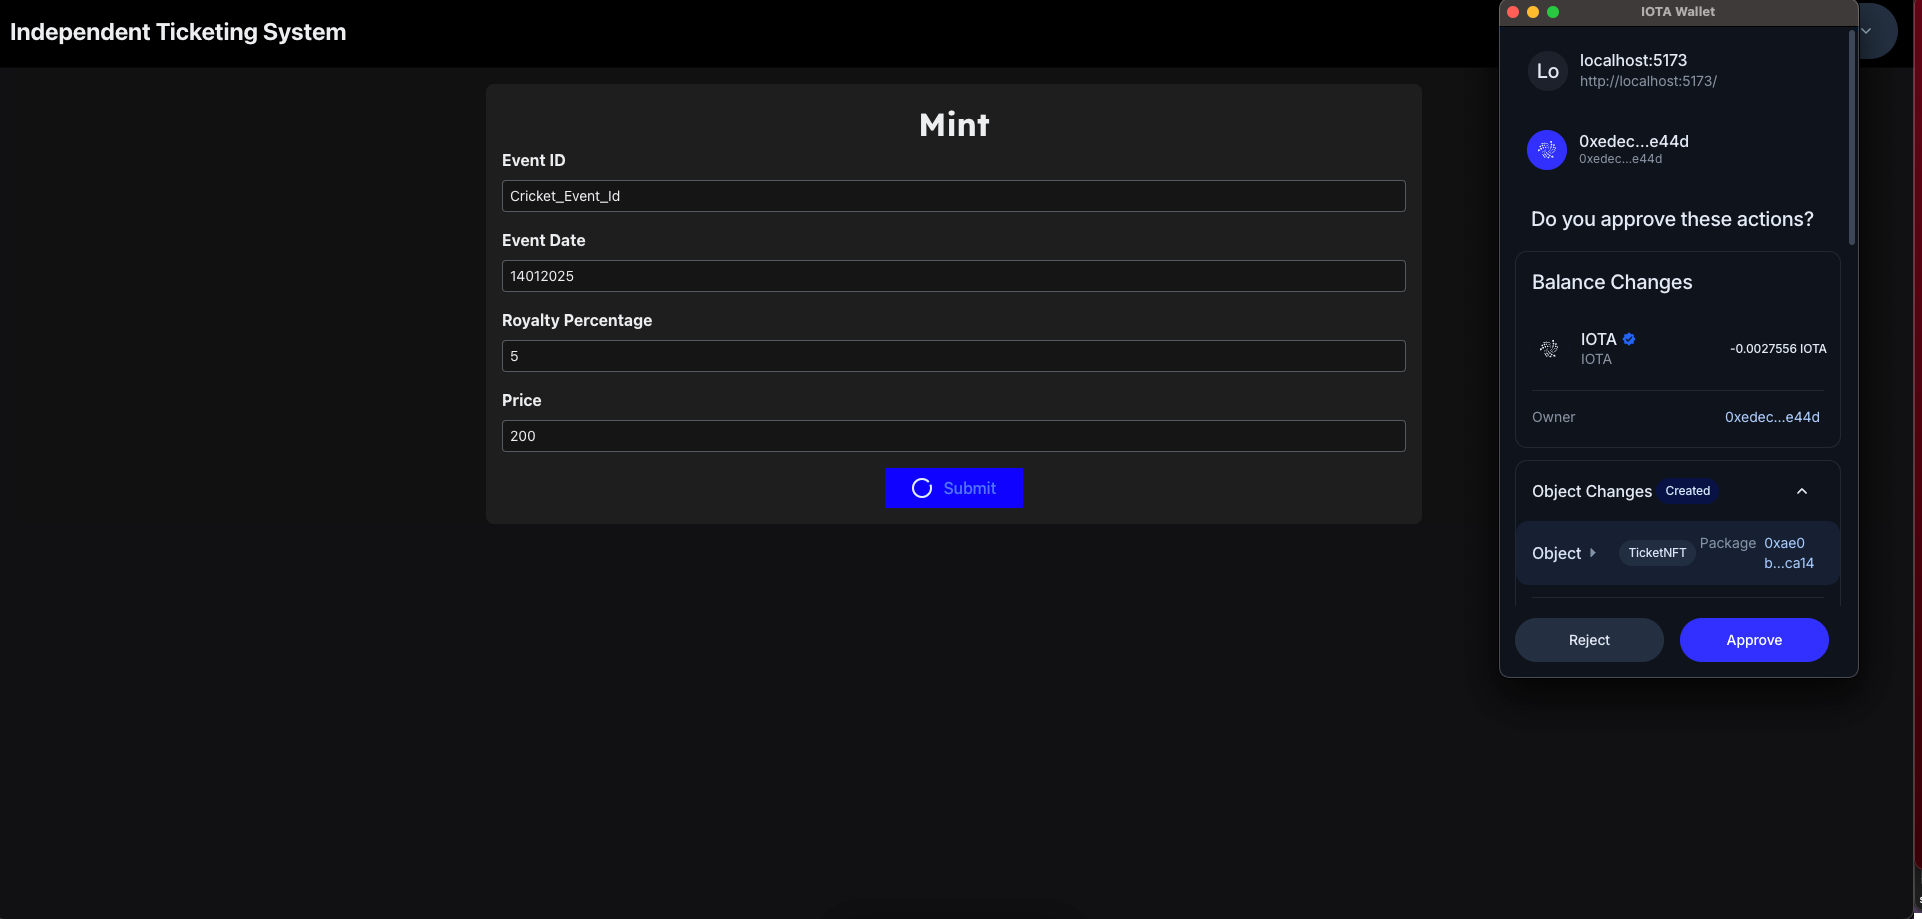
Mint Tokens
- Click on the mint button located at the top-right corner (ensure that the creator account is connected).
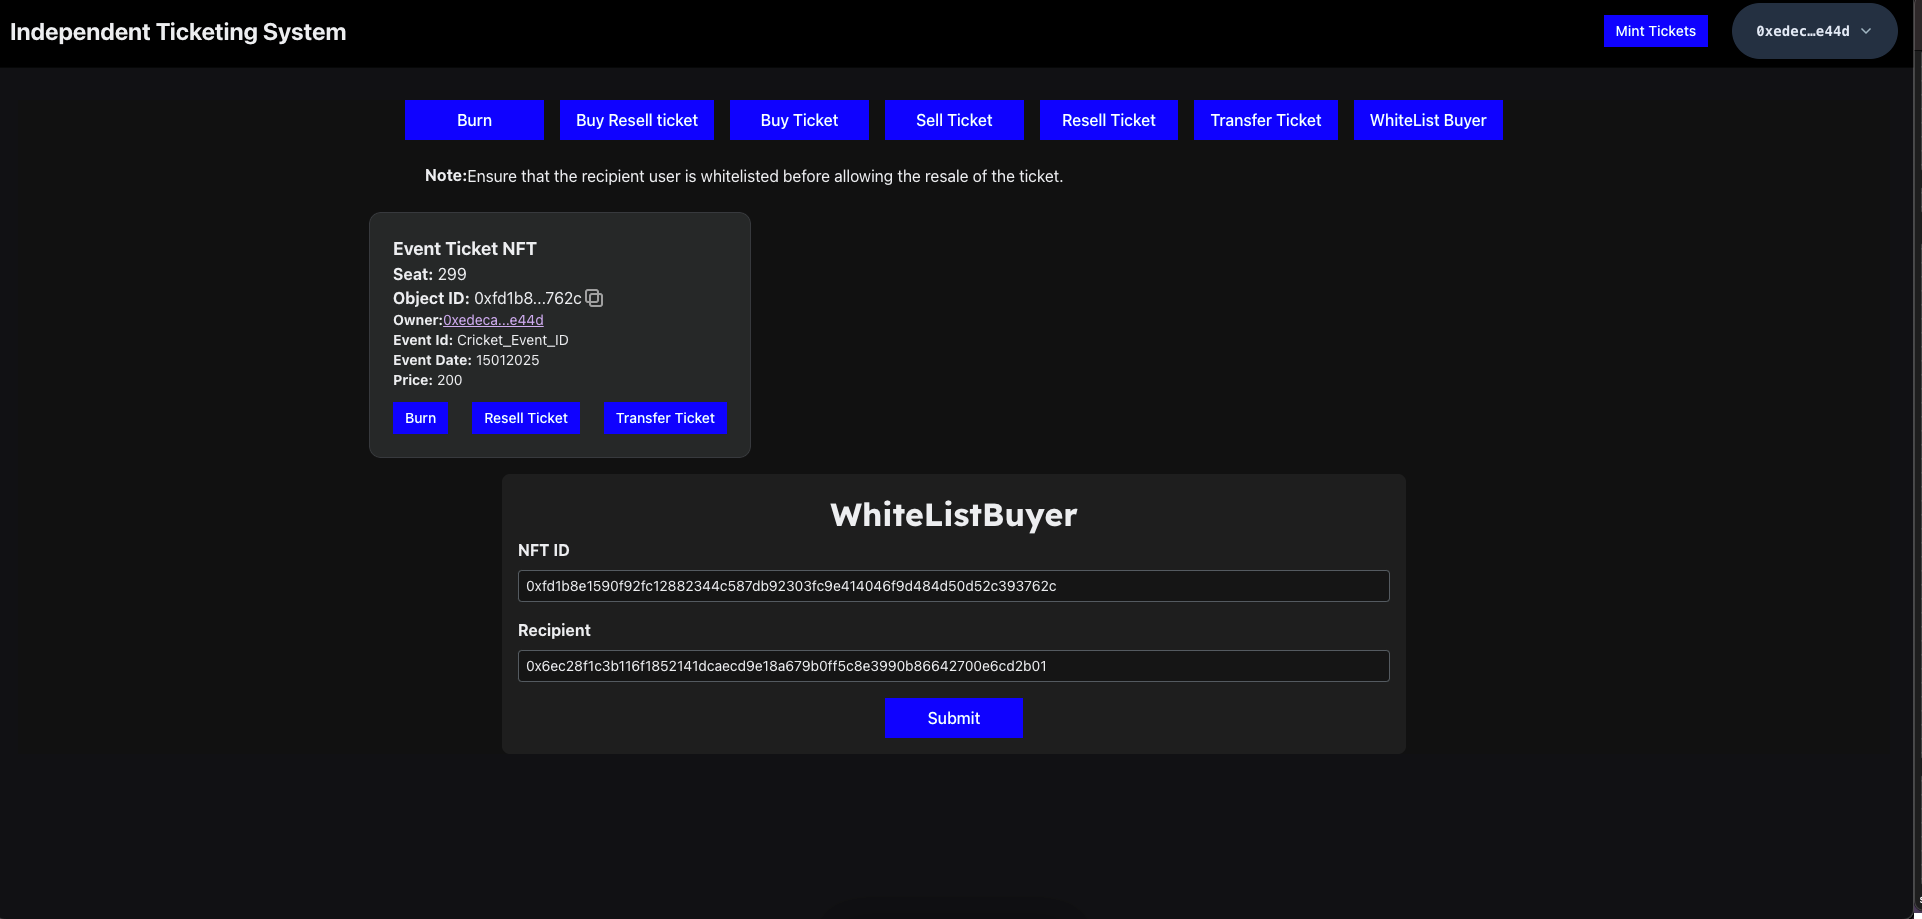
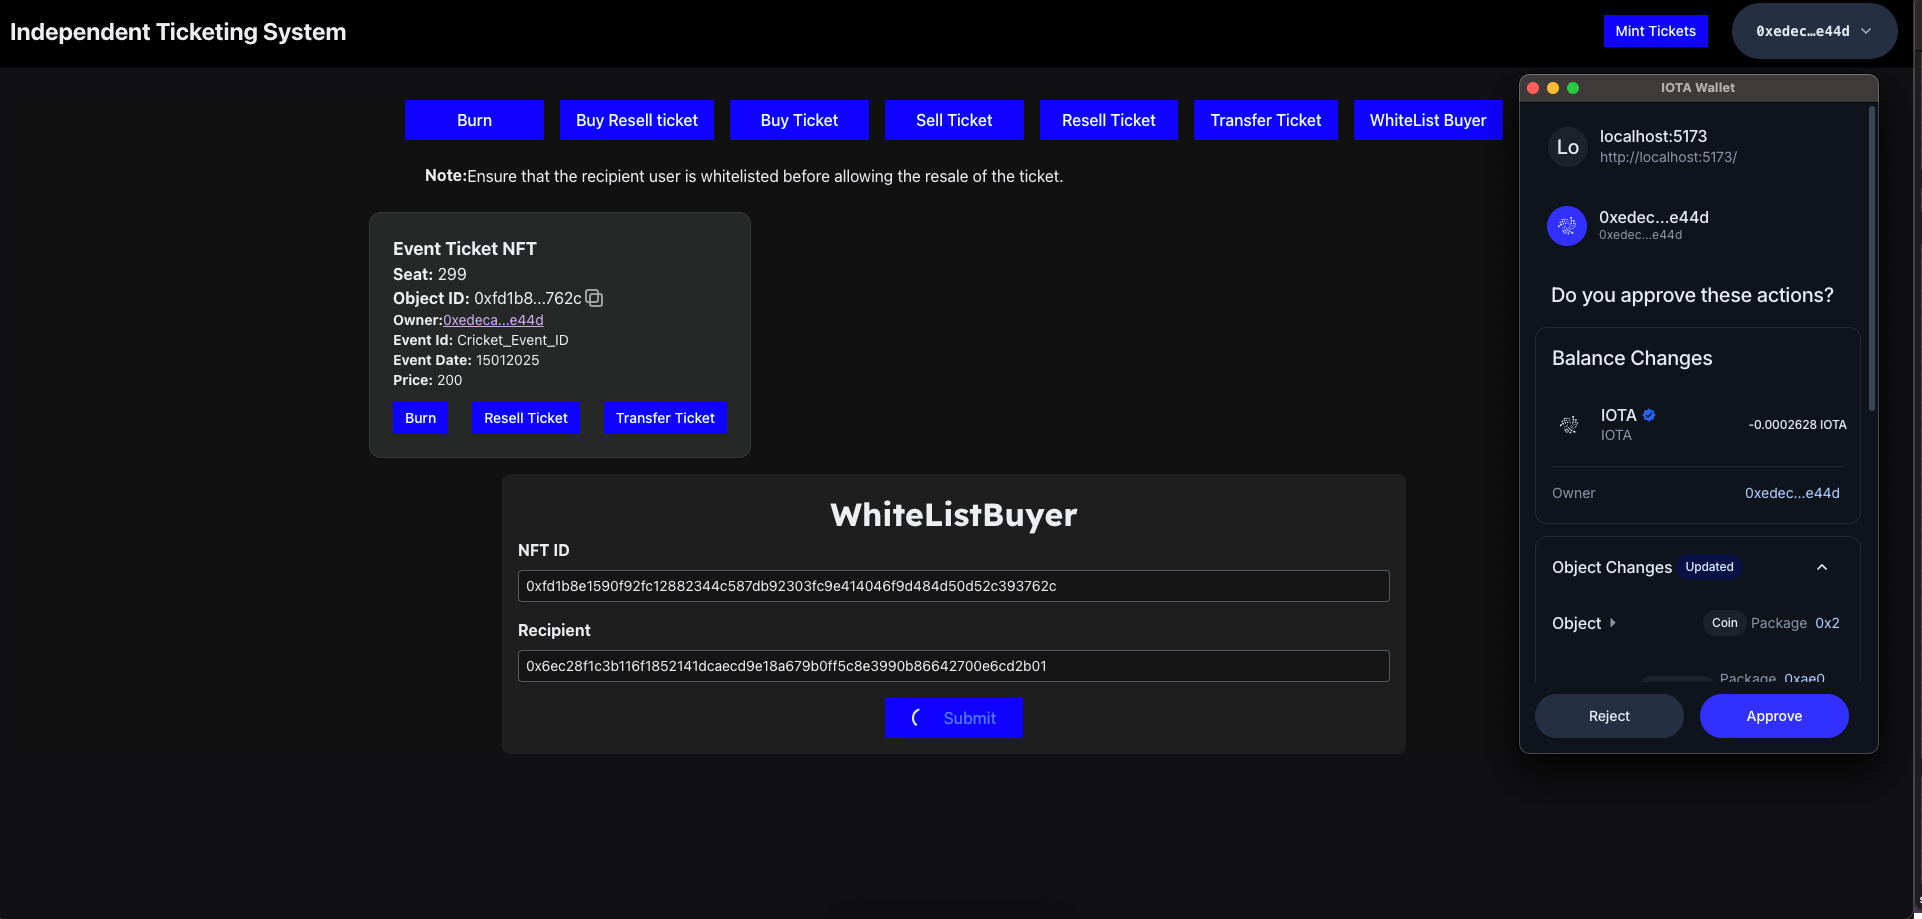
Whitelist Users
- Before making the ticket available for purchase, whitelist the users first.
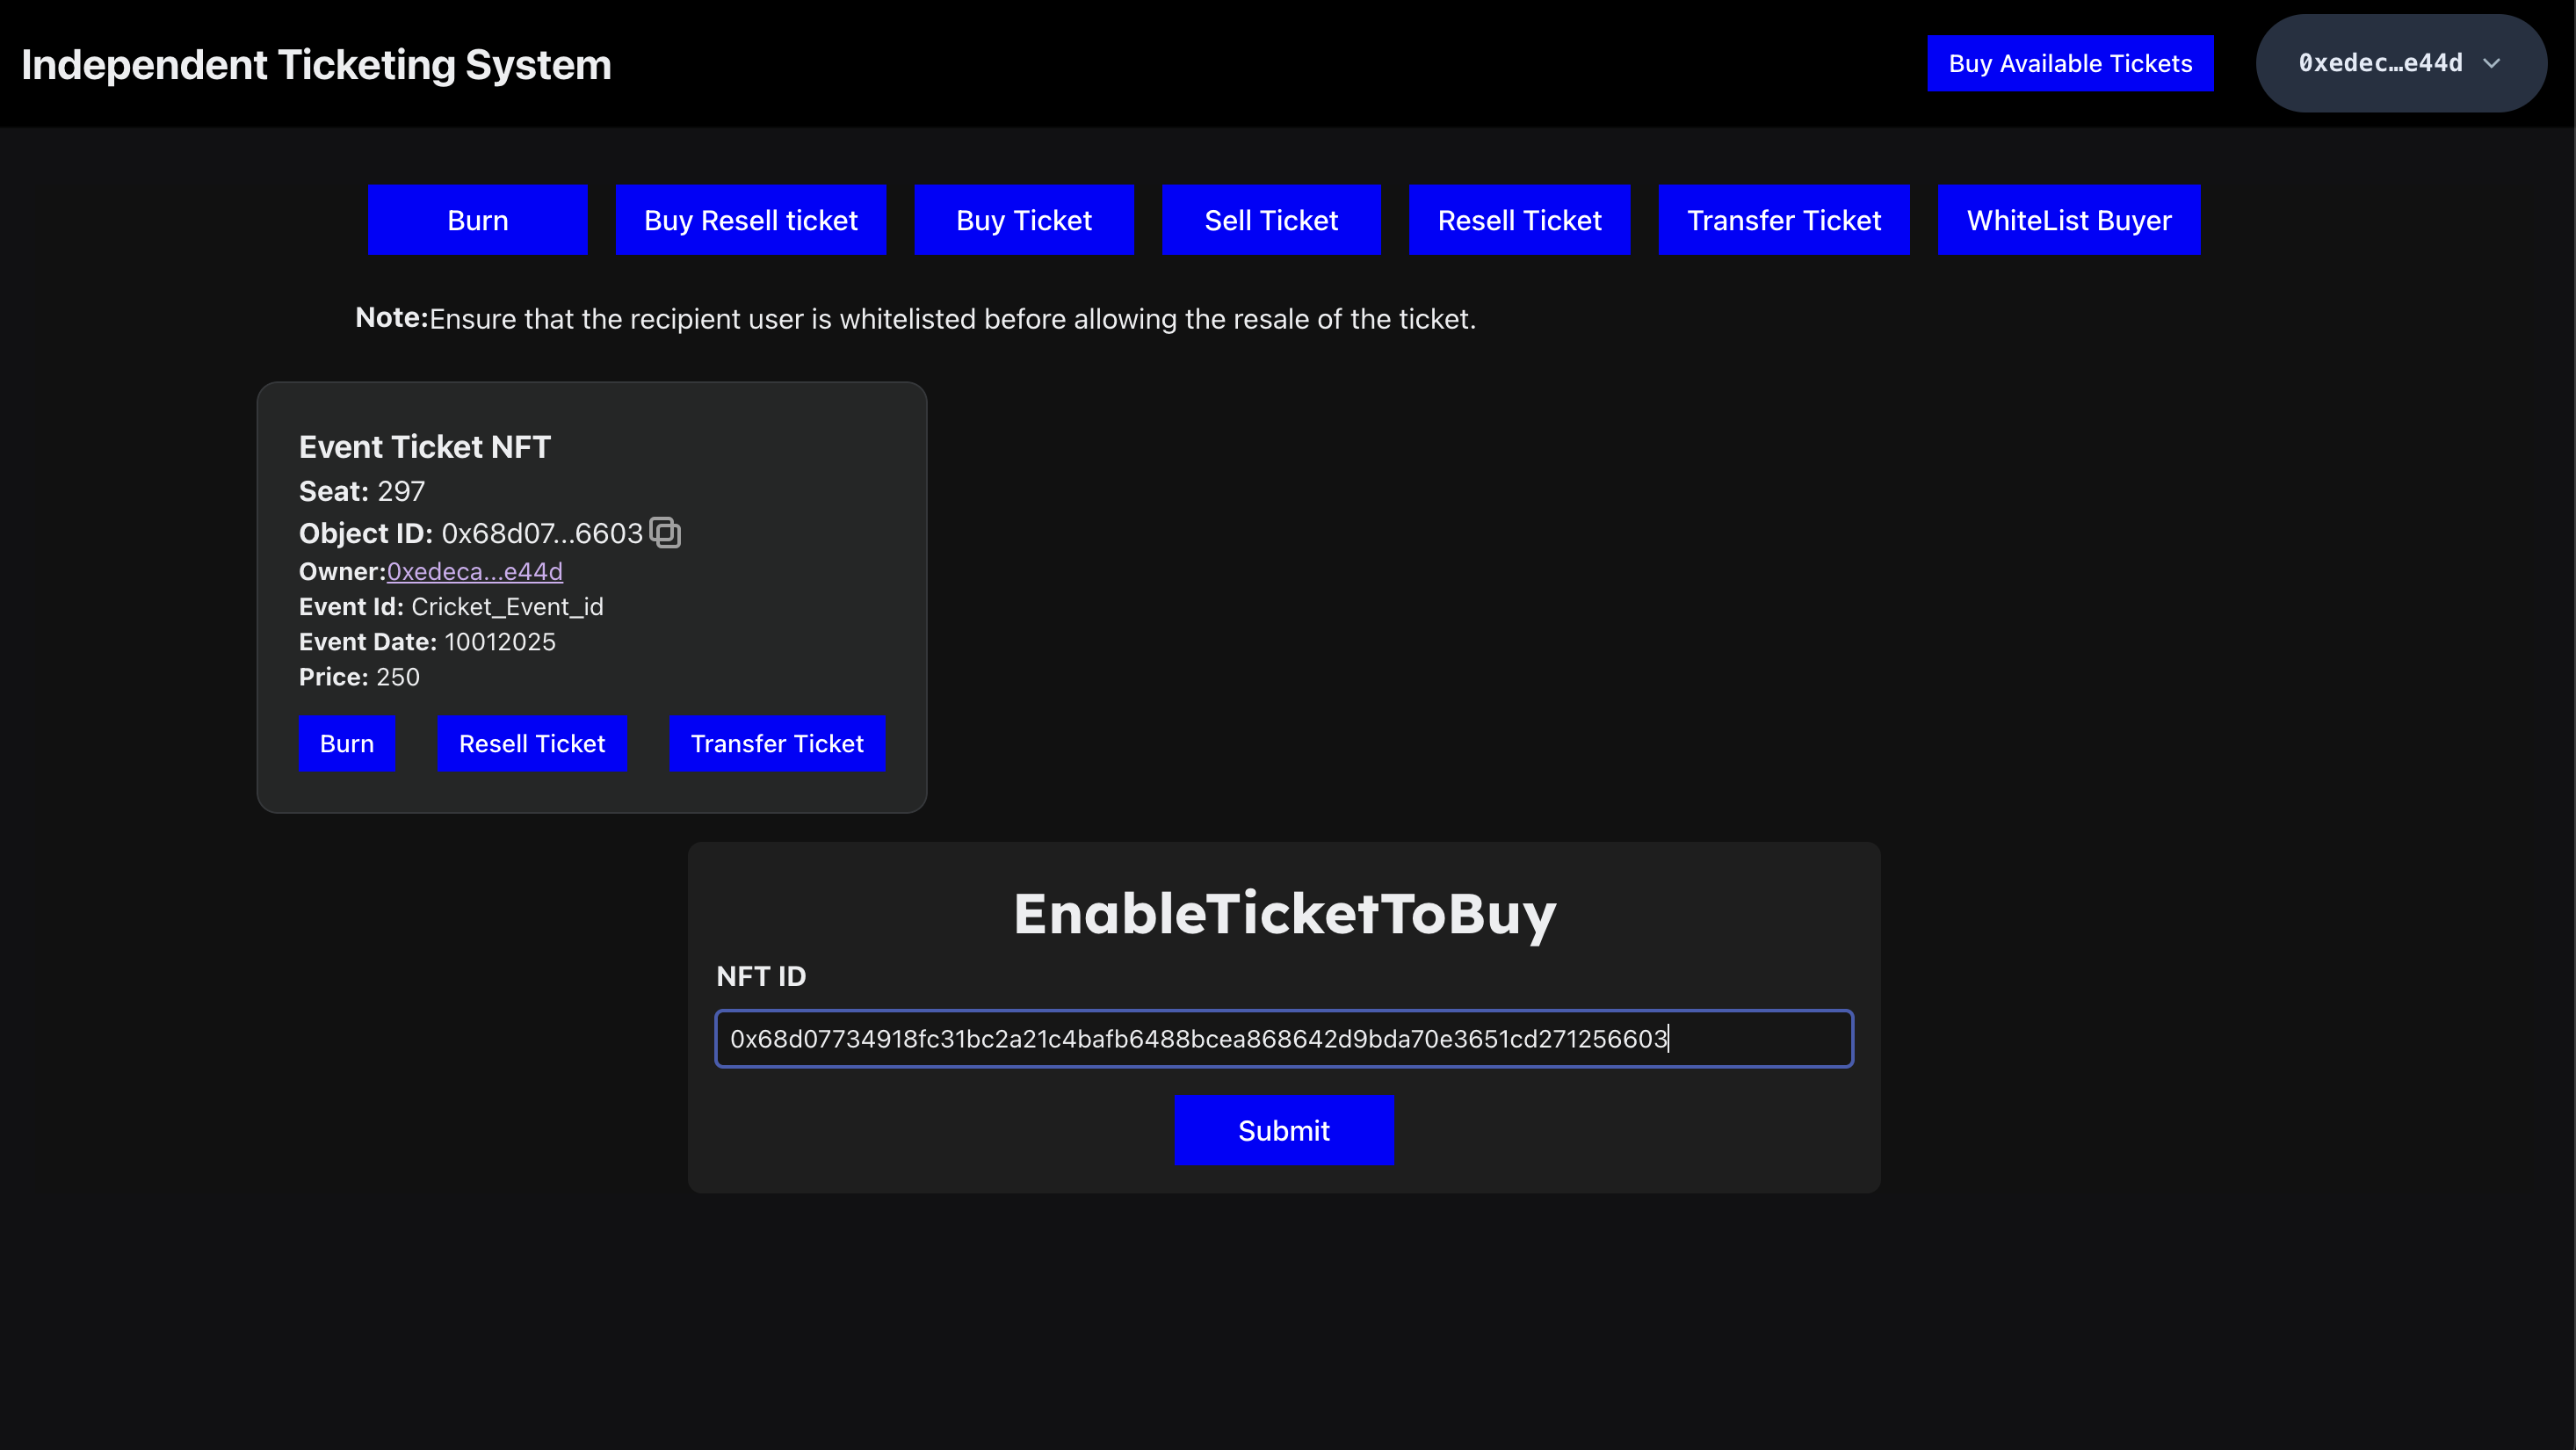
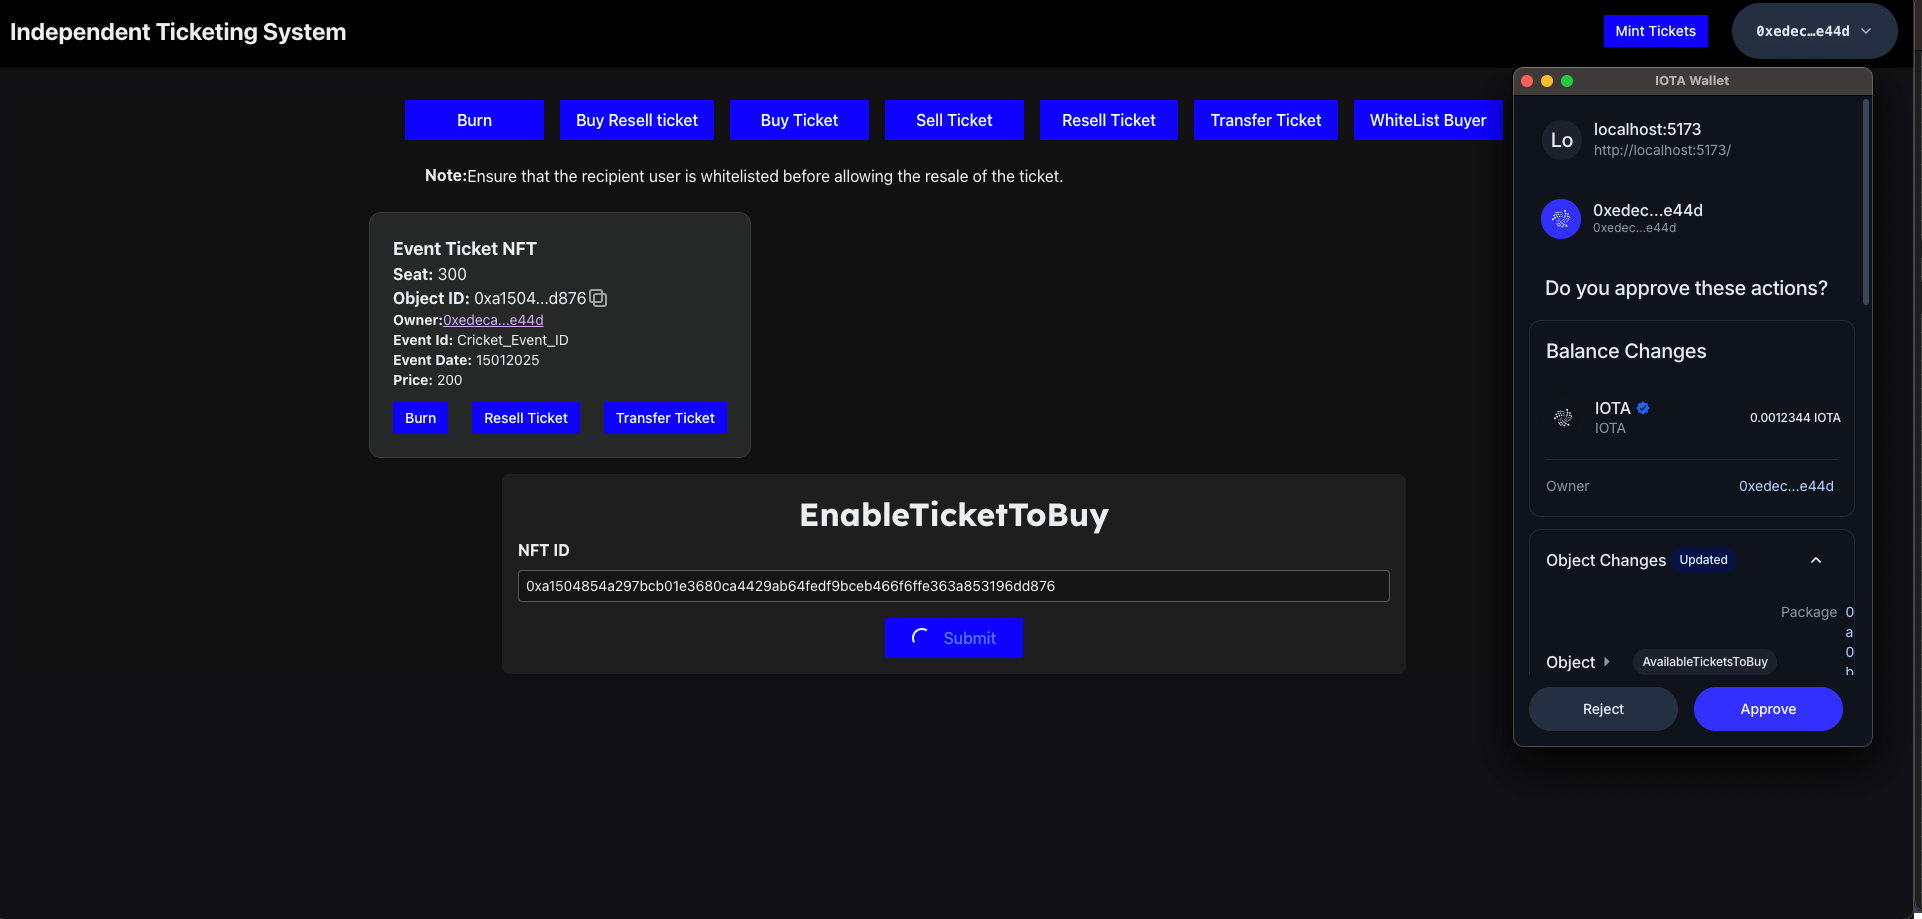
Enable Ticket to Buy
- After whitelisting users, you can add the ticket to the
AvailableTicketsobject. Follow the steps below to complete this process.
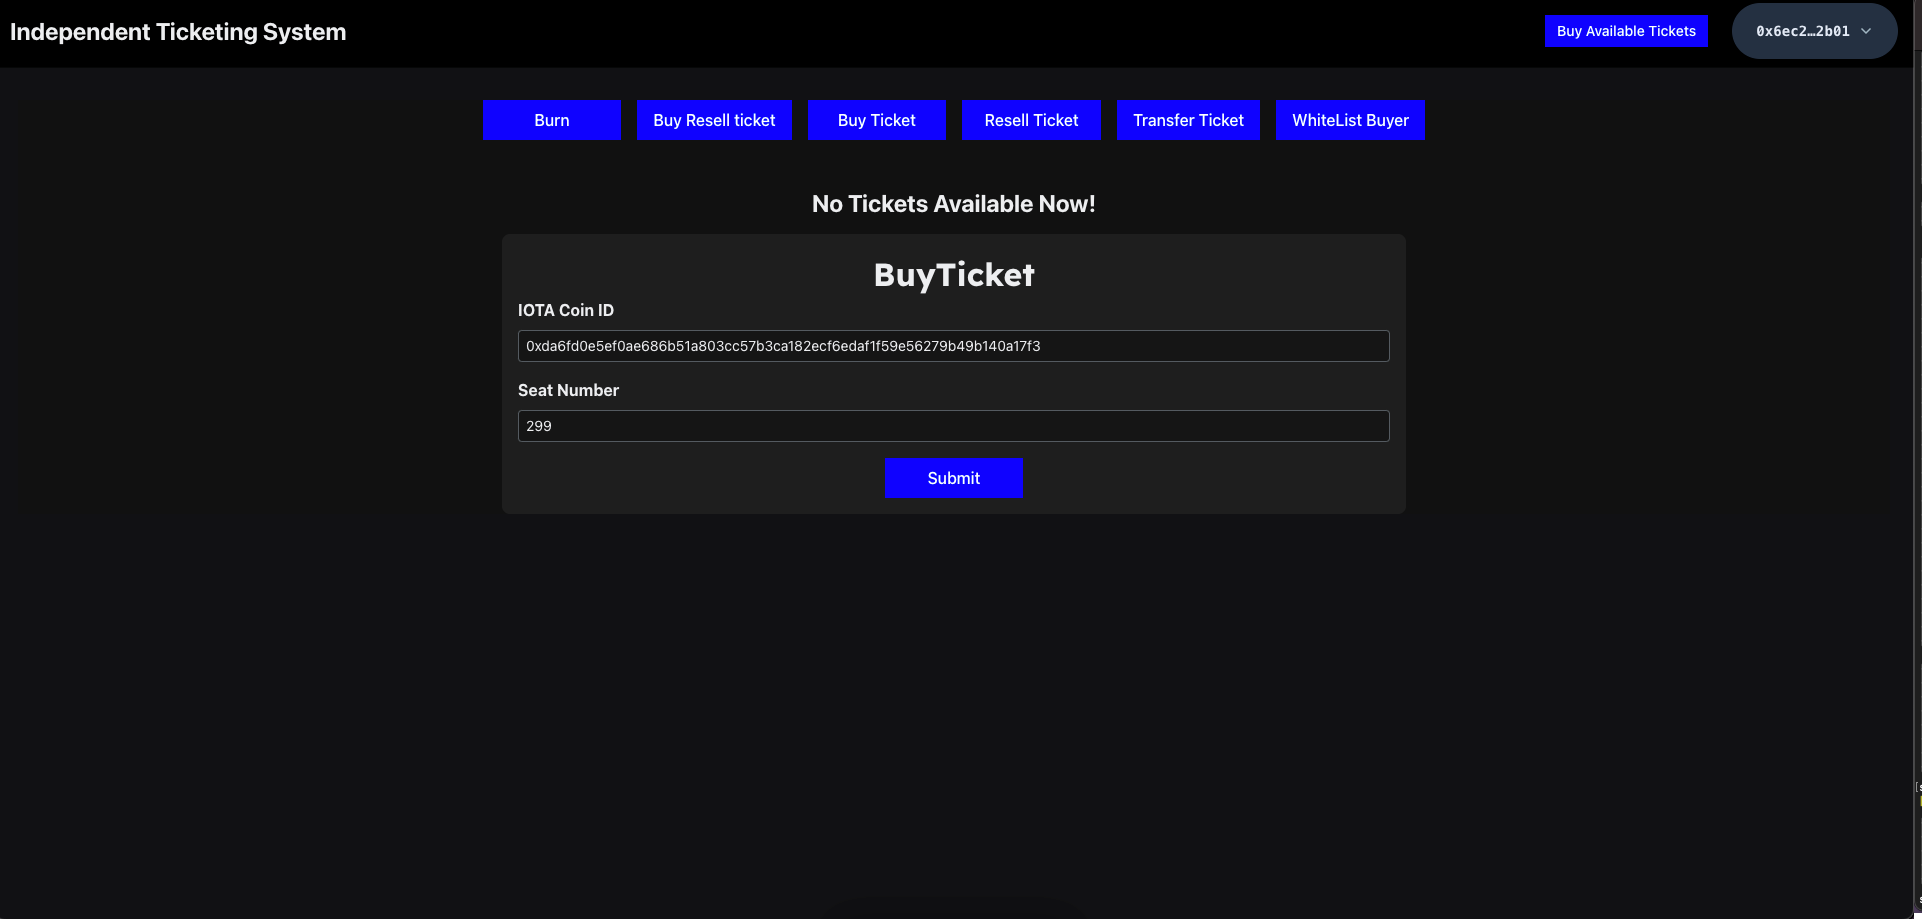
Buy Ticket
- To buy a ticket, enter the seat number and your IOTA coin address.
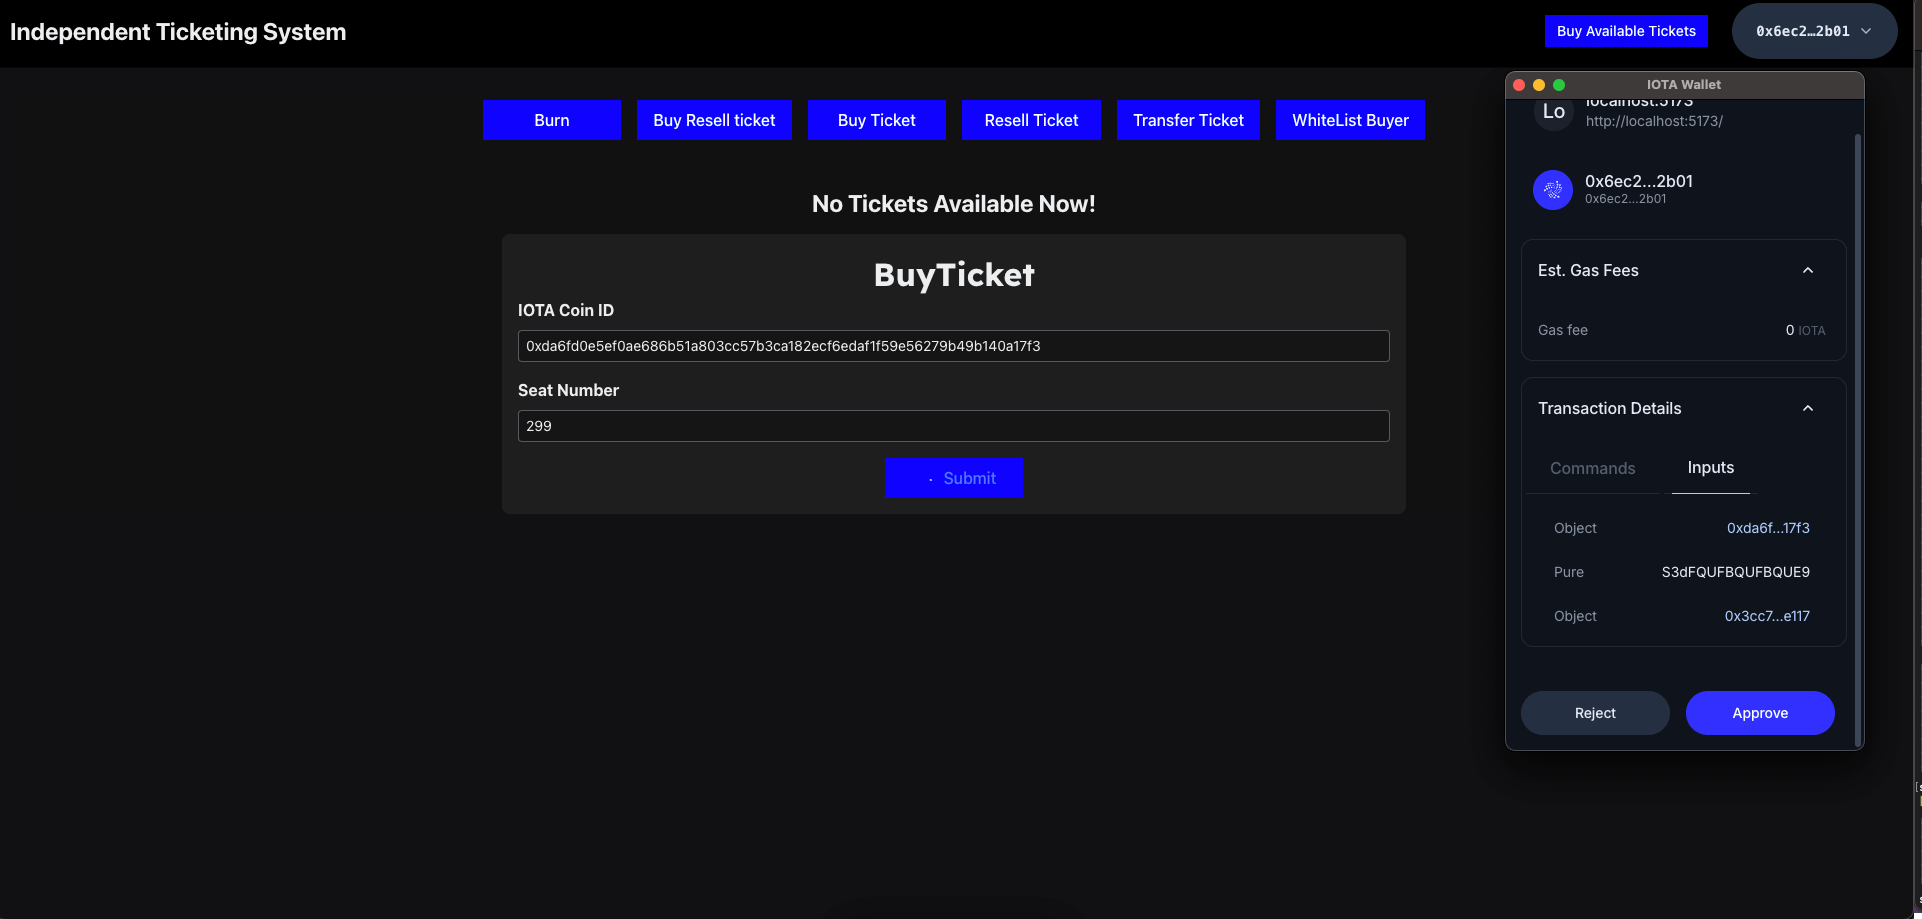
- Once the ticket is purchased, the NFT will be displayed on the dashboard as shown below:
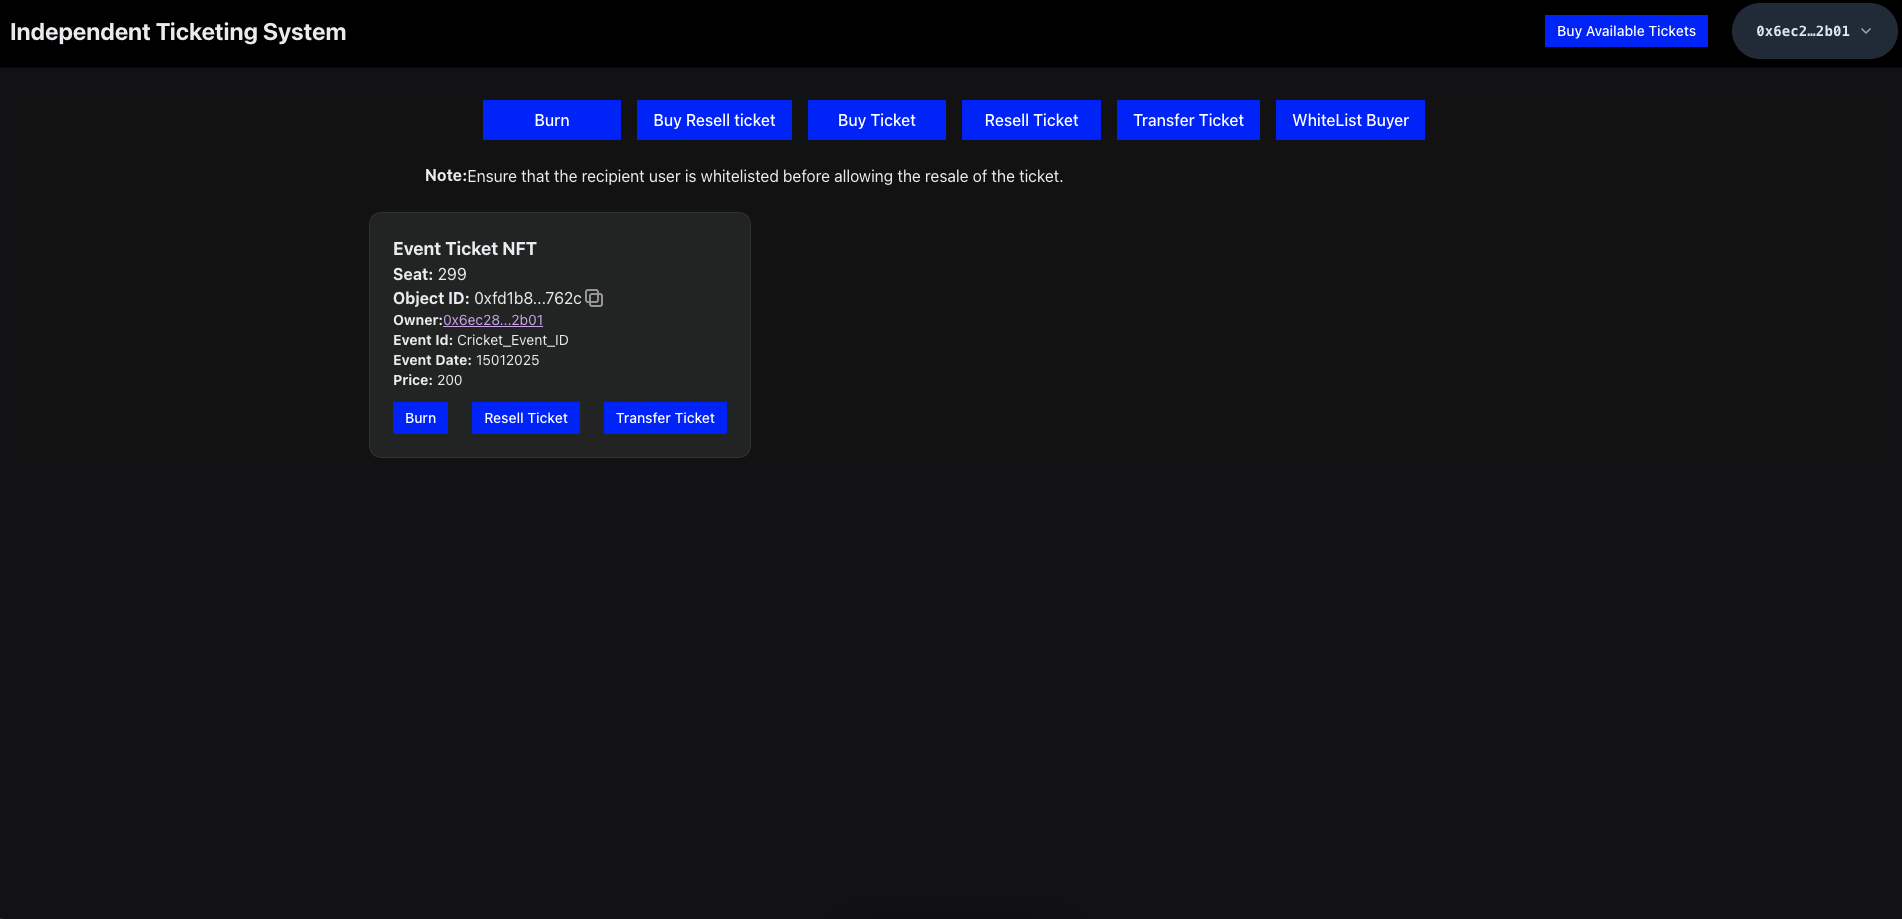
Resell Ticket
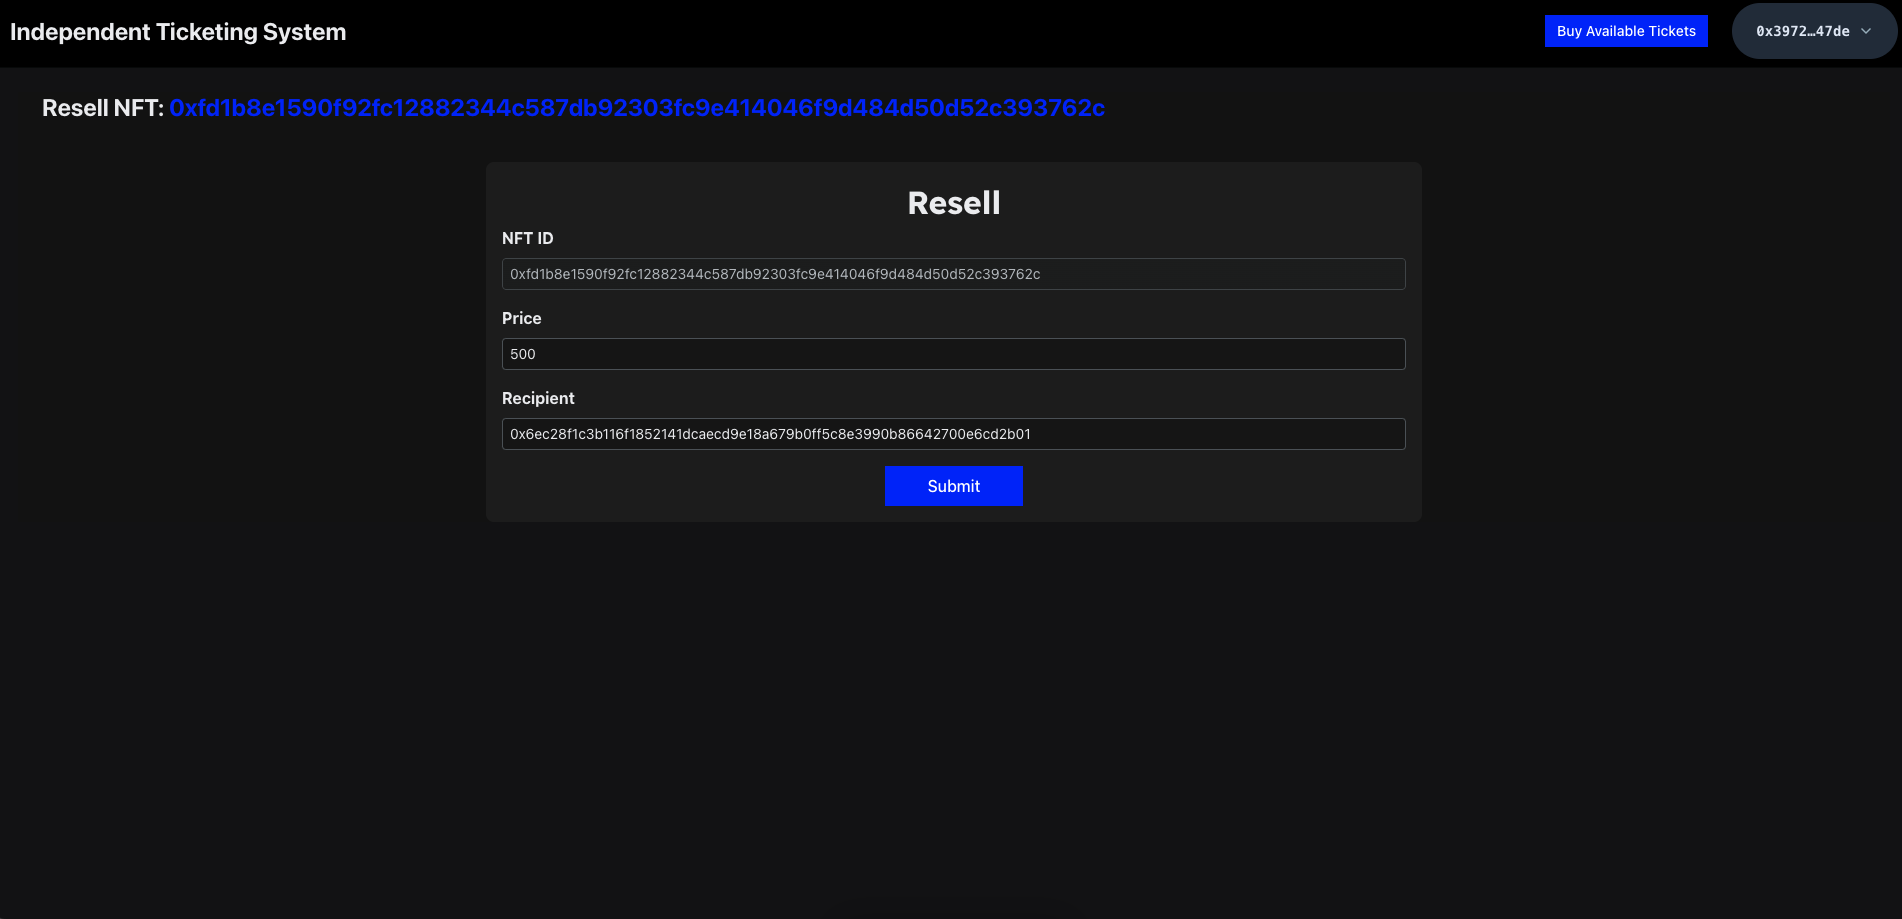
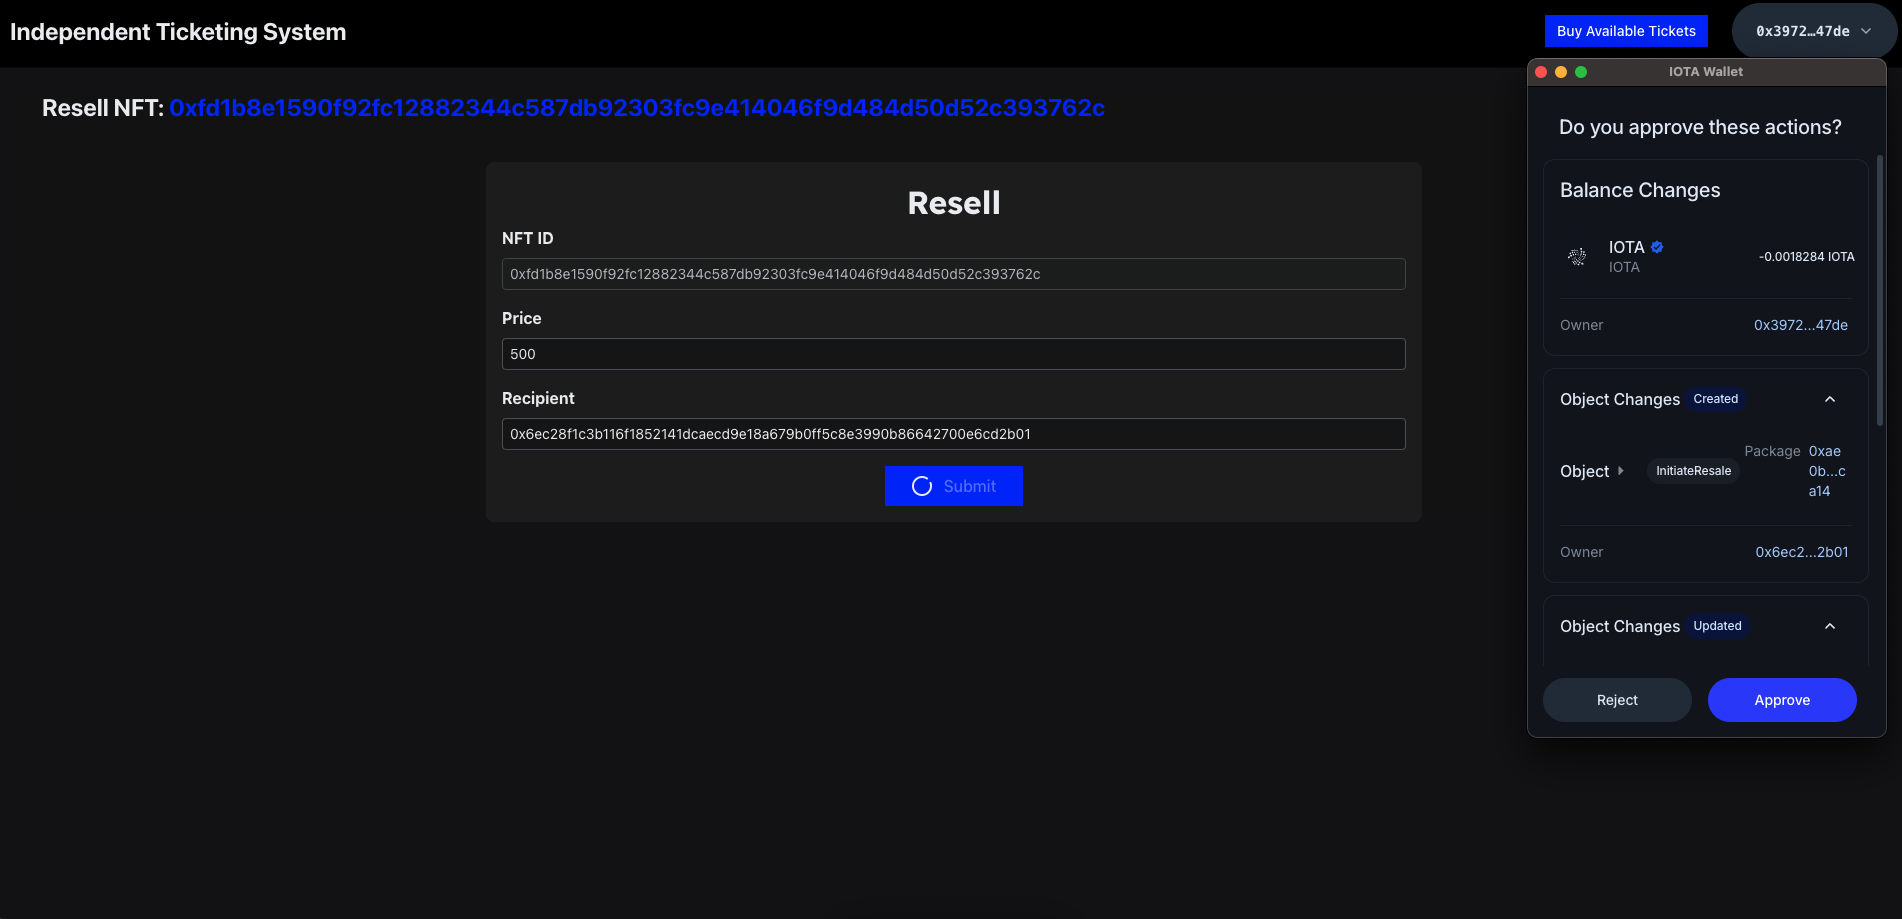
- Resell a ticket by wrapping the NFT into another object (
InitiateResale). You can either update the price of the NFT or keep the same price as before.
Transfer Ticket
- To transfer a ticket, click on the transfer button on the dashboard page or on the transfer button of the NFT listed under owned tickets, and enter the NFT ID.
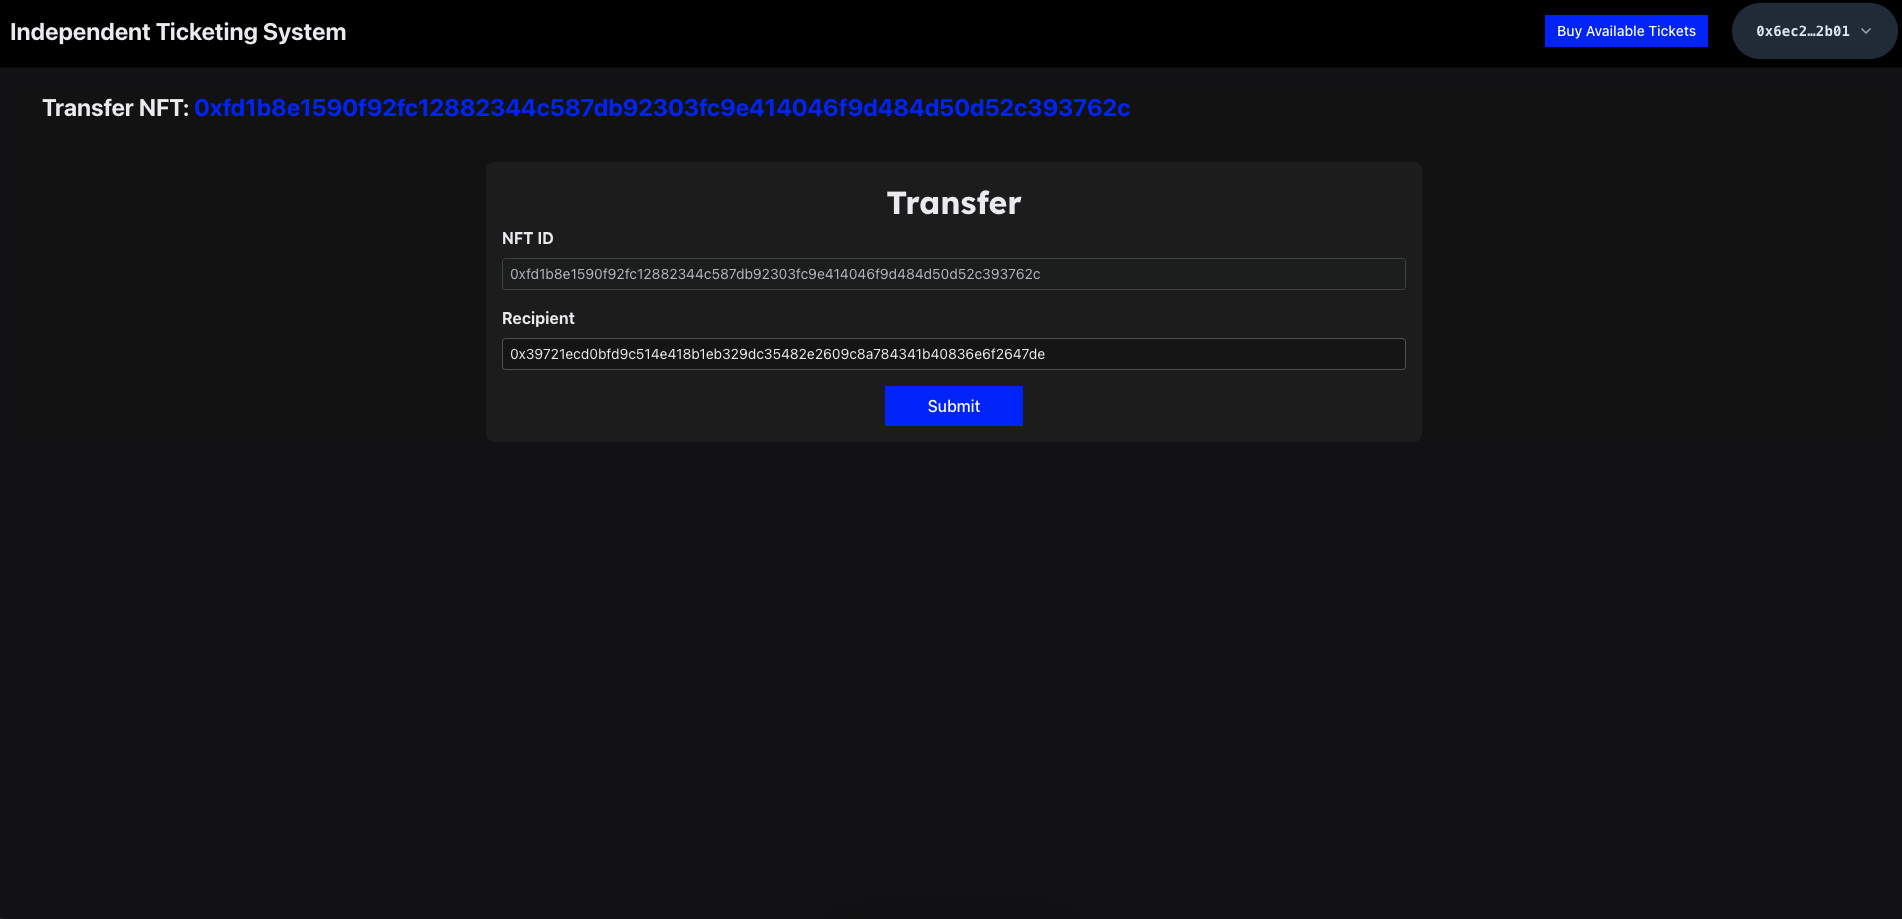
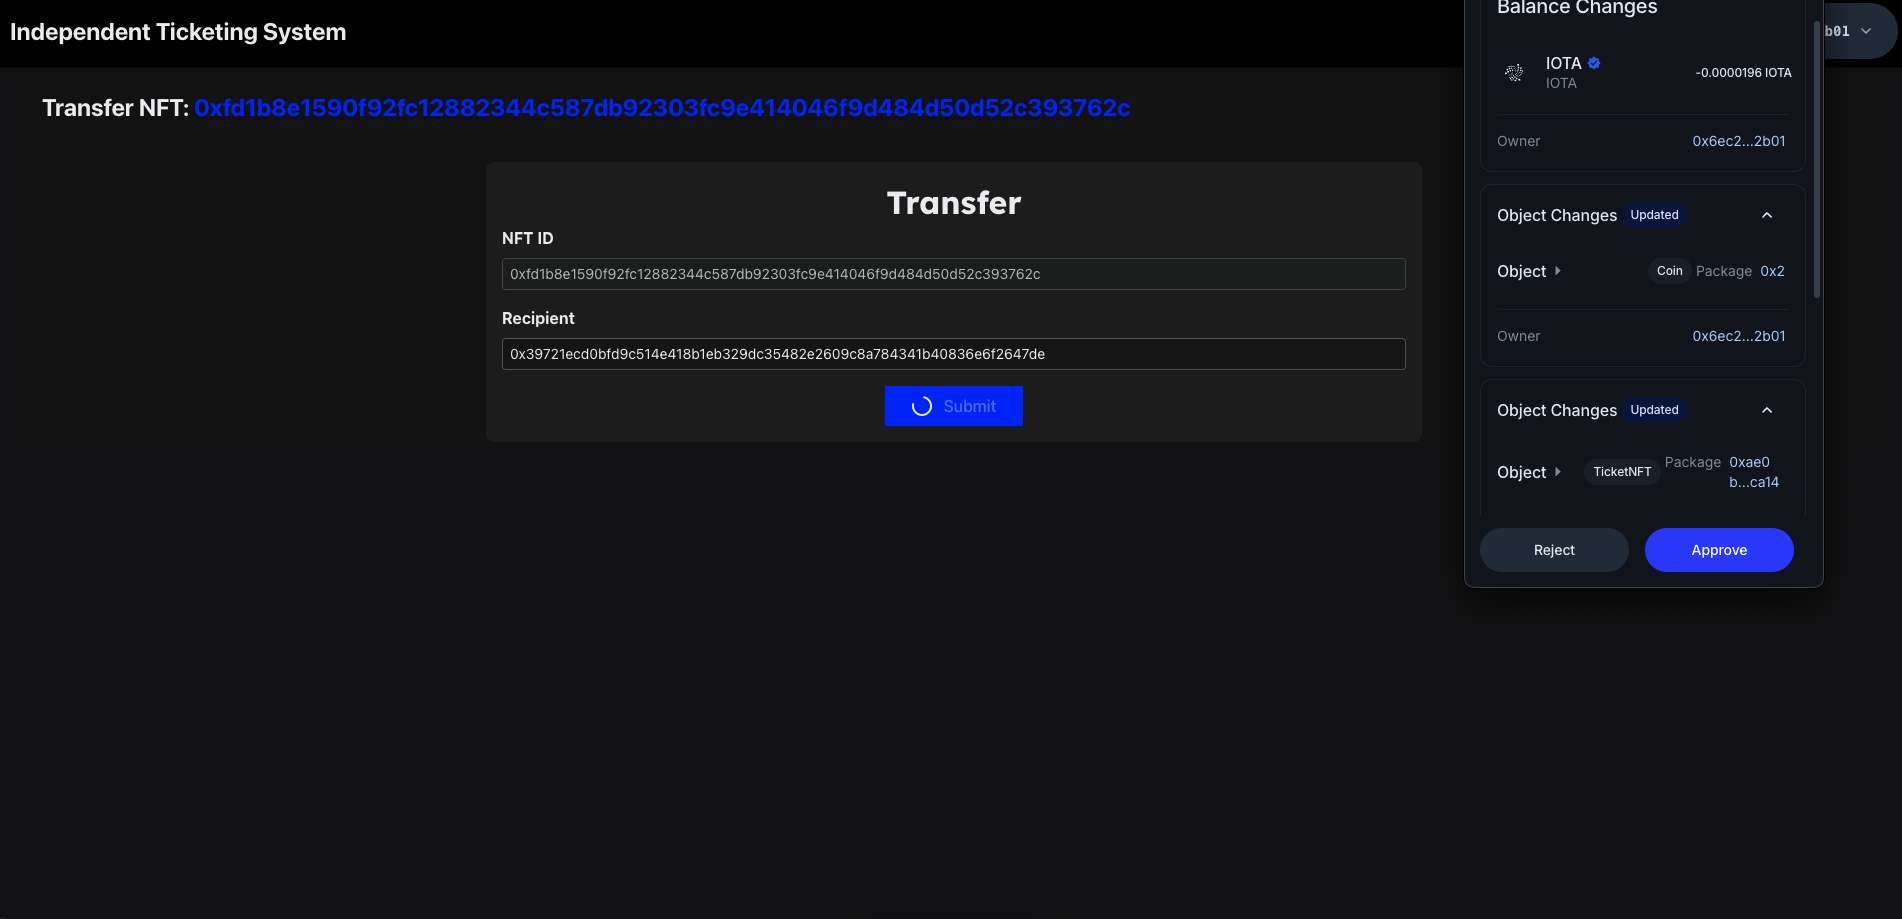
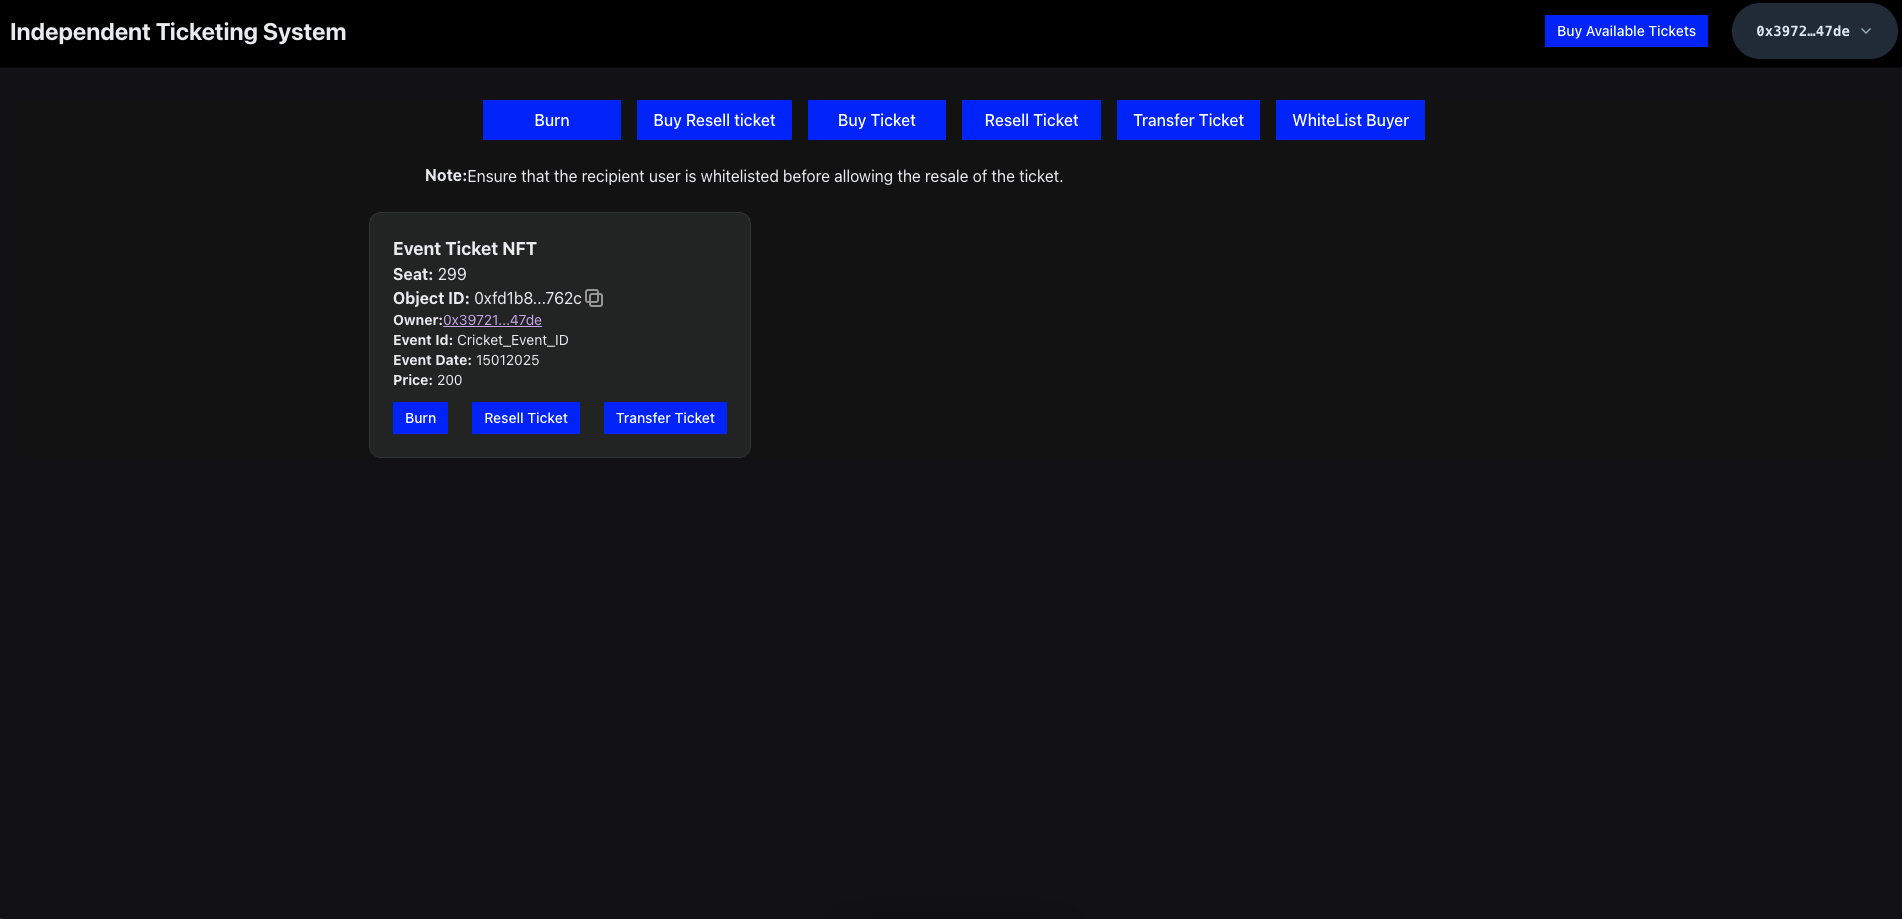
- After the transaction, the NFT will appear under the recipient's address, as shown below:
Conclusion
In this tutorial, we successfully built an independent ticketing system where NFT tickets are created using the IOTA Move language for the contract package. We went through the functionality of the contract step by step and demonstrated how it works within the system. Additionally, we explored the integration of the IOTA dApp kit into the frontend, providing a comprehensive guide for building a fully functional dApp. Each component was explained in detail, from minting and transferring tickets to reselling and burning them, ensuring a clear understanding of the system. By following this tutorial, you should now be well-equipped to develop and deploy your own ticketing application using IOTA's technologies, offering a secure and decentralized solution for ticket management.